Quickstart
Get up and running with Fancy Etch in just a few minutes. The only requirement is a compatible CSS framework to provide the underlying design tokens — pick whichever suits your workflow, and you're ready to go:
- Fancy Framework — free solution, native to Etch.
- ACSS 4 (Automatic.css) — premium framework.
Copy and paste
Once you're logged into your account, head to the templates list, pick the one you need, and paste it straight into the Etch editor.
For this to work, your site must be served over HTTPS with a valid SSL certificate, and you'll need to allow clipboard permissions in your browser the first time you paste.
@keyframes animations in Etch
Etch writes a class's CSS inside its selector, and a browser throws away a
@keyframes it finds there: the class says animation-name and nothing moves.
The editor does not complain, so it looks like it should work. There are two
ways to make it run.
In the class, with the Fancy Etch plugin
With the Fancy Etch plugin active, write the
@keyframes in the class that uses it, like any other rule:
/* The CSS of .fe-hero__title */
animation: fe-hero__title-in 0.8s ease both;

@keyframes fe-hero__title-in {
  from { opacity: 0; translate: 0 1.5rem; }
  to   { opacity: 1; translate: 0 0; }
}

@media (prefers-reduced-motion: reduce) {
  animation: none;
}
The plugin moves it to where the browser keeps it, on the page and in the builder, while you type. Nothing is written to your styles: the class stays as you wrote it.
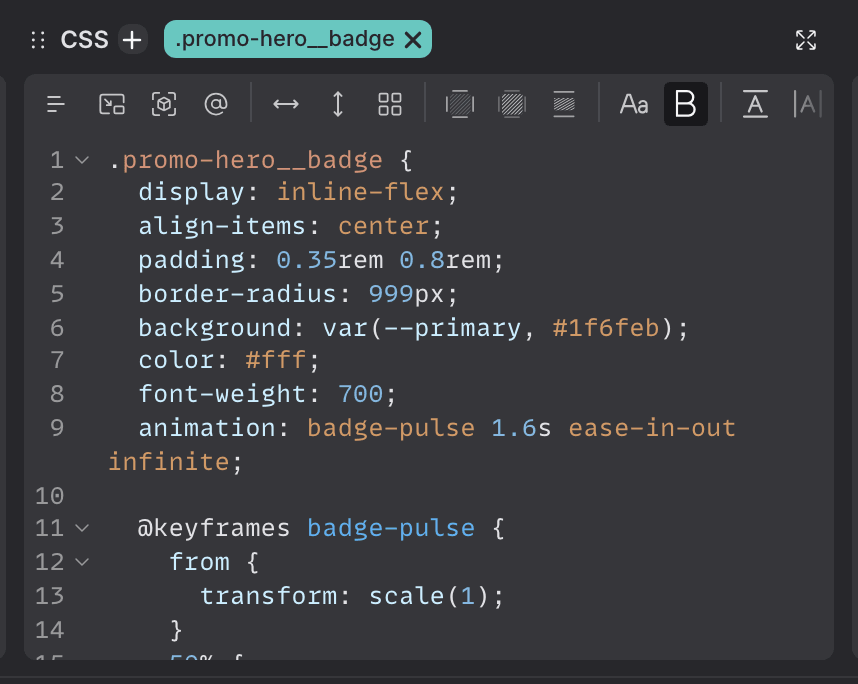
- The animation lives with its element. Select the element and its frames are in its CSS, ready to change.
- It travels with the template. Paste it on another site and there is nothing to create in the Style Manager. That site needs the plugin too: without it the animation does not run, and the rest of the class still works.
- One class can define an animation others use. A page gets every
@keyframesits classes name, wherever it is written. - A condition around it stays. A
@keyframesinside a@media,@supportsor@containerin the class keeps that condition. - Names are shared by the whole site. Start each one with its class, as above. If two classes write different frames under the same name, only the last one runs, and the builder says so in the browser console.
- A stylesheet with the same name wins. When you move an animation from the Style Manager into its class, delete the old one.
- It can be turned off in Fancy Etch → Etch, under Styles.
In a stylesheet, without the plugin
The @keyframes goes in a Style Manager stylesheet, under the
Stylesheets tab, and the class keeps only the animation that names it.
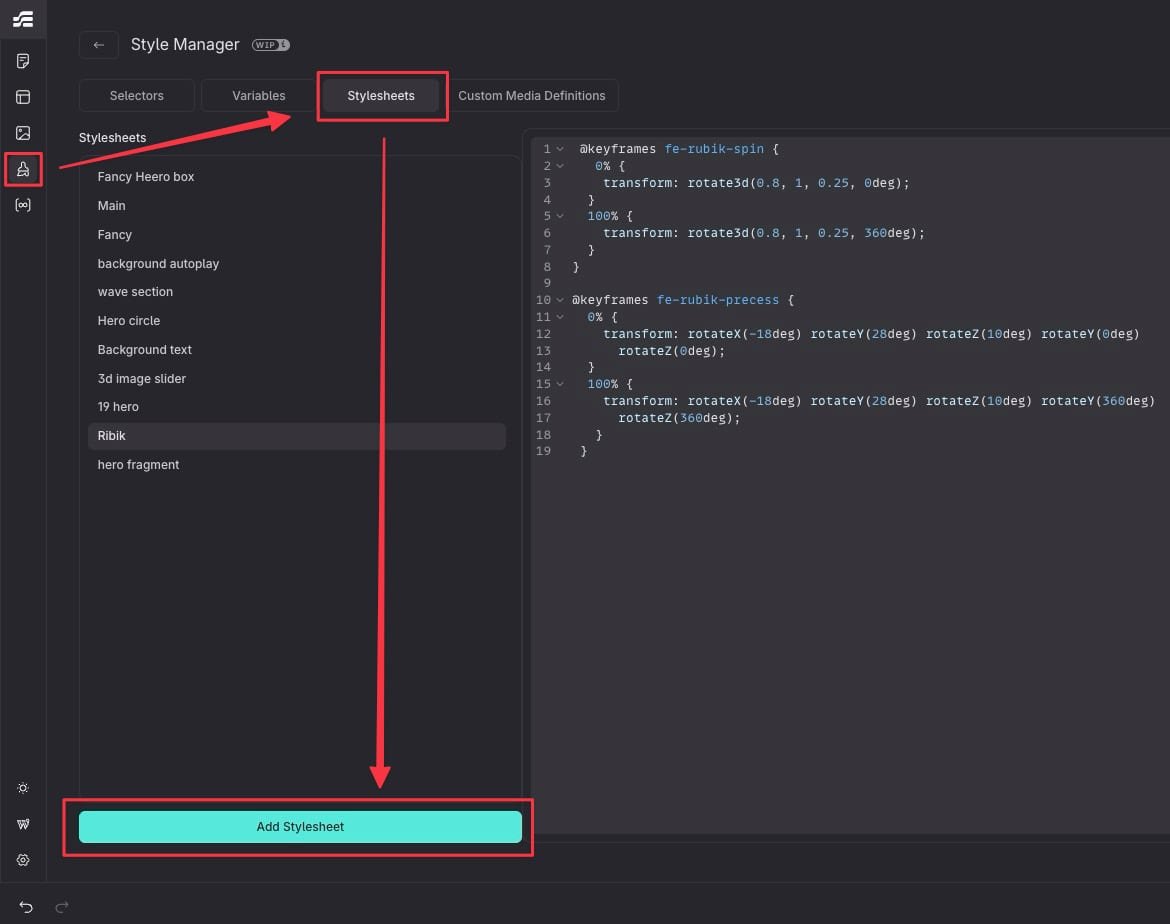
- Open the Style Manager. In the left sidebar, click the Style Manager icon. This opens the manager with four tabs: Selectors, Variables, Stylesheets, and Custom Media Definitions.
- Go to the Stylesheets tab. You'll see a list of the project's existing stylesheets (Main, Fancy, and one per animated component or layout).
- Create a new stylesheet. At the bottom of the list, click Add Stylesheet. Give it a descriptive name related to the component or layout the animation belongs to (e.g. "Fancy Accordion").
- Paste your
@keyframes. In the code editor on the right, paste your animation.
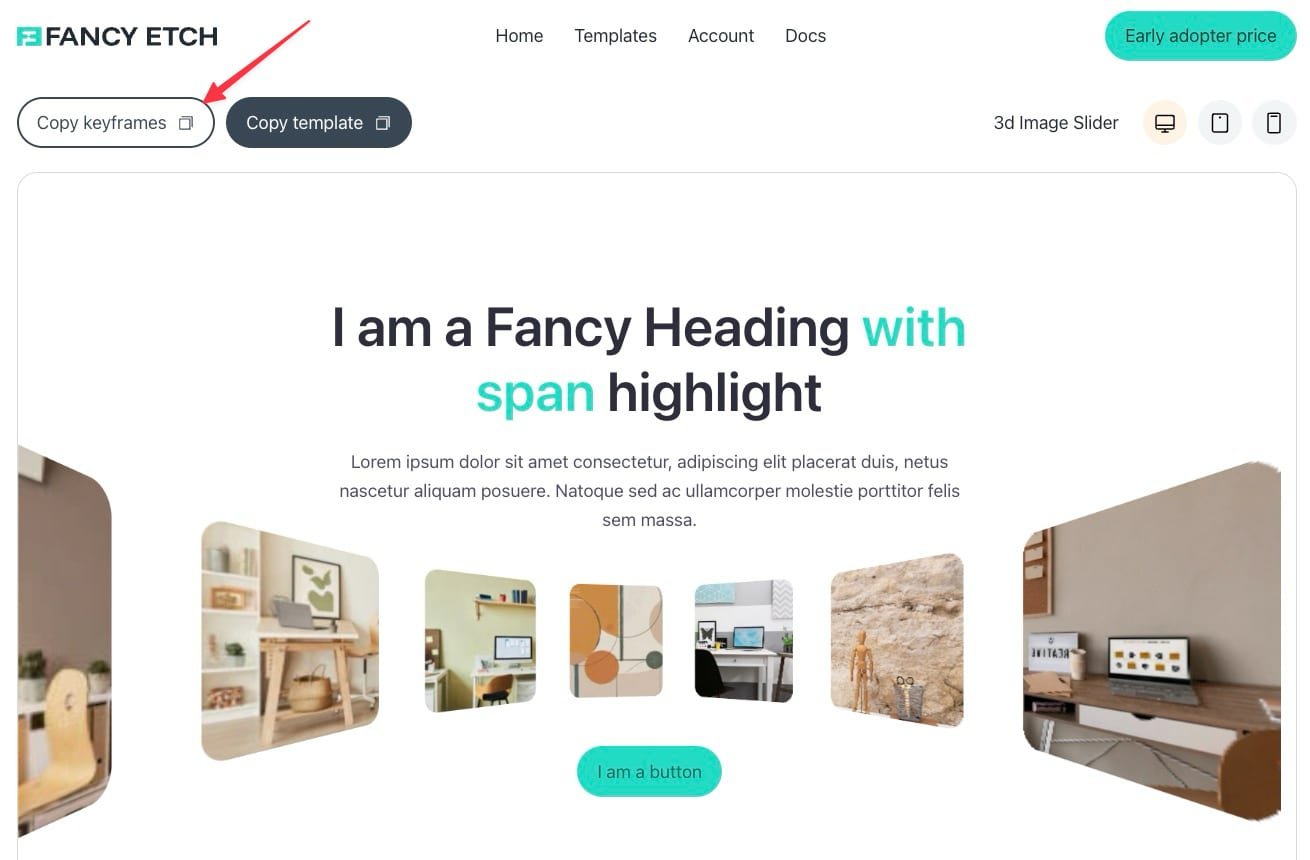
Where to copy the keyframes from. A template that uses animations has a Copy keyframes button next to Copy template on its page:
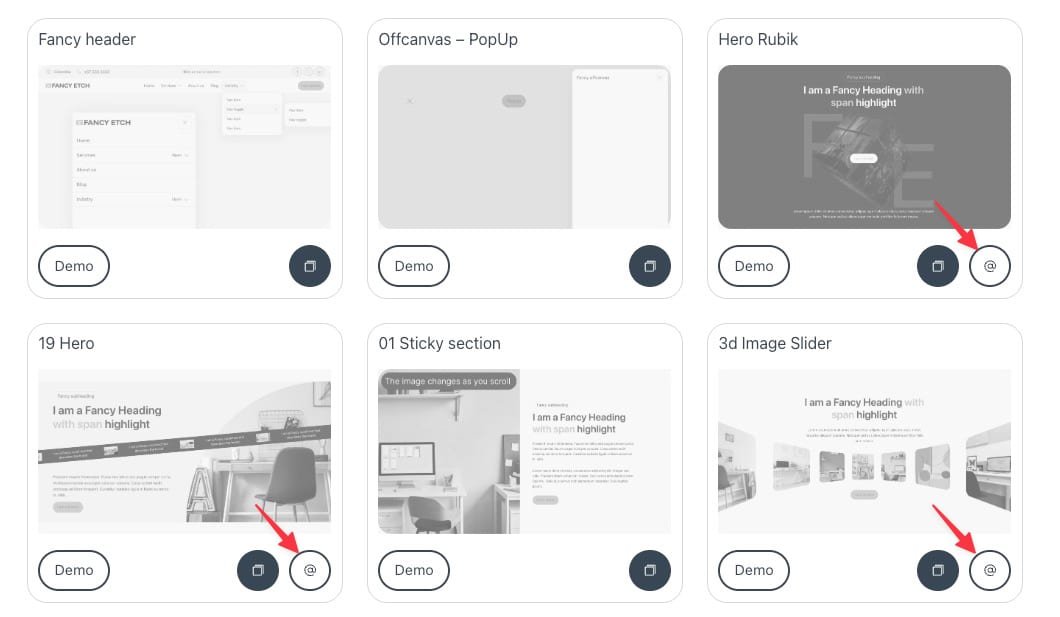
And in the templates list, those templates show a second button on their card, beside the copy button, that copies their keyframes:
Create one stylesheet per component or layout. This keeps the project organized and makes it easy to find and update specific animations later.
Custom Media Definitions
Fancy Etch uses a set of custom media definitions to handle responsive design and ensure visual consistency across all layouts and components.
@custom-media --fe-2col (inline-size >= 560px);
@custom-media --fe-3col (inline-size >= 840px);
@custom-media --fe-4col (inline-size >= 1120px);
@custom-media --fe-5col (inline-size >= 1400px);

@custom-media --fe-landscape (inline-size >= 478px);
@custom-media --fe-tablet (inline-size >= 767px);
@custom-media --fe-desktop (inline-size >= 991px);

@custom-media --fe-below-tablet (inline-size < 767px);
@custom-media --fe-nav-mobile (min-width: 901px);
When you paste a layout or component, its required media definitions are imported automatically. However, it's a good idea to copy all definitions upfront and paste them into the Custom Media Definitions tab — this lets you manage and adjust all breakpoints globally from the start, in one place.
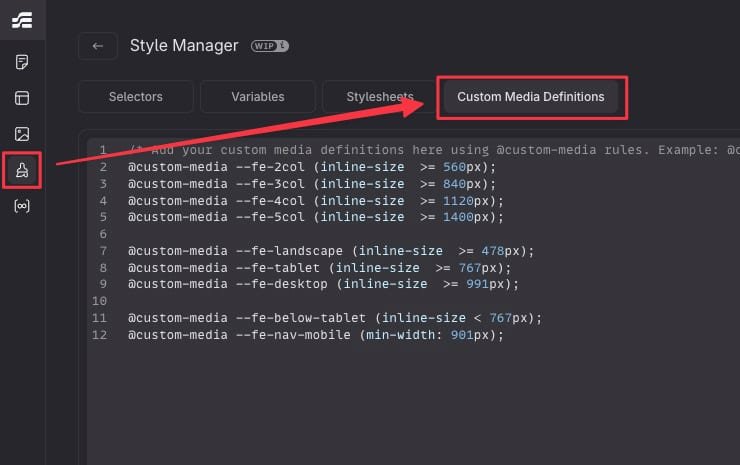
One of these, --fe-nav-mobile, is defined with media-query syntax
(min-width: 901px) instead of the inline-size >= container-query syntax every
other token uses — that's intentional, navigation breakpointing behaves as a real
media query rather than a container query.
Component styles
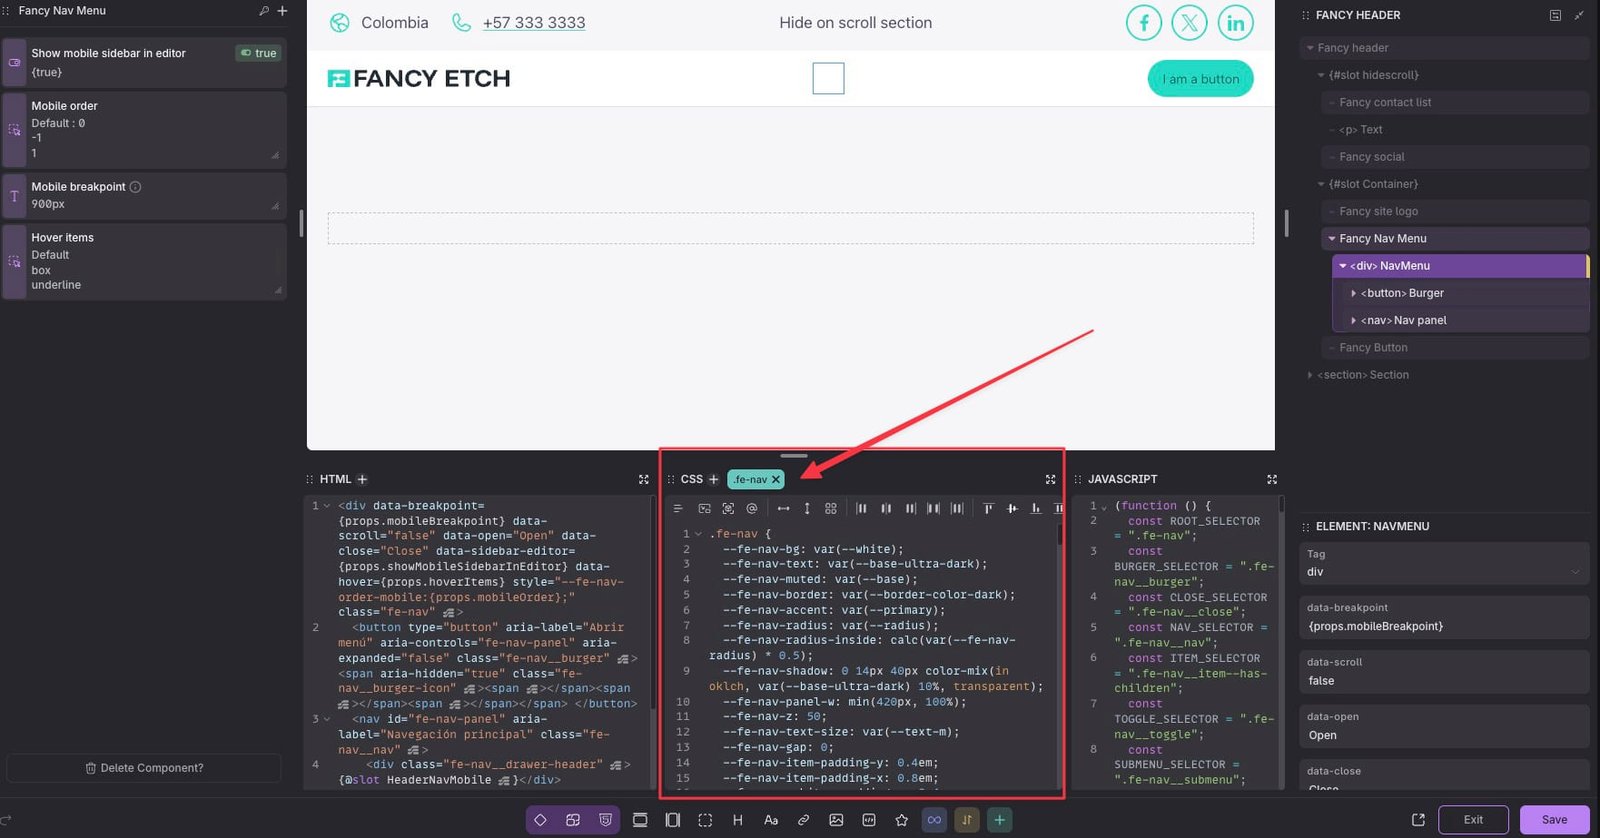
To avoid cluttering the component panel with too many options, you can find the
component styles in the variables of the component's main class — open that
class and every themeable knob (colors, spacing, sizes, timing) is right there as
a --fe-* variable, editable without touching a single nested selector. See
Accordion for a complete example.